Friday, December 16, 2016

Gift Tag

I found this gift tag tutorial at Your Next Stamp and I realized it was the perfect approach to a tag for this bottle of wine. We bought the bottle last night and need the tag by tomorrow, so this tutorial was perfectly timed. Unfortunately, I didn't have a YNS stamp and die set that was large enough, so I had to use a different brand. Here's the front of the tag tied onto the wine bottle with twine.


 Here's the back of the tag. I used the only Happy Hanukkah stamp that would fit in the space even though it is not my favorite stamp. I inked the edges of the bag to give it a more finished look. This is my entry to the YNS color challenge #54.

Thanks for looking and Happy Holidays!

Supply List:
Kaisercraft Rose Stamp
Memento ink Rich Cocoa
Powderpuff Ink Mocha Mama
Copic markers BG000, BG01, BG53, BG93, YG61, and colorless blender
Twinery Cappuccino 

Wednesday, November 30, 2016

Wine label Card

I was staring at this label on the wine bottle at dinner the other night, so I brought the bottle home and soaked the label off. To make this card, I scanned the label, printed it out and distressed the edges, and created this card around it. I enhanced the design on the label with my copics.


This is my entry to the #109 color challenge at Markerpop. I've included all 5 colors.  The wineglass and grape  stamps are from Heartfelt creations and the greetings are from Your Next Stamp. Images are stamped with Memento Tuxedo black and colored with copics in E50, E51, YR30, YG61, BG93,R59, and 0. Background papers are from Paper House. 

Thanks for looking!

Thursday, November 24, 2016

Bike Journey

While in the Netherlands, my husband and older son took a long bike ride to this castle. 36 km each way with a huge headwind on the return. My son had never ridden anywhere near this far before and it was more about the journey than the castle.


I used this sketch from Stuck?! Papers and inks are from Quick Quotes, stamps from Unity.

Monday, November 21, 2016

Bike Utrecht

As I mentioned in a previous post, my husband went on Sabbatical to Utrecht Netherlands. He and our older son went first. On their first day, they bought used bicycles to get around. The upper photo shows them riding on our street and the lower photos show where they locked the bikes behind the apartment.

This is my entry to the November Tear-it-up challenge at Quick Quotes. I tore the bottom of the chevron paper. Most of the product on this layout is from the Quick Quotes Baggage Claim collection and edges are inked with their wonderful Powderpuff inks in coal miner and sunset. I used sketch #166 from sketch-n-scrap.

Thanks for looking!

Thursday, November 17, 2016

Destination: Utrecht

My husband took a Sabbatical in Utrecht, Netherlands. He left with our older son and then the other 2 of us followed a couple weeks later. This page shows them heading into the airport when I dropped them off and then in front of the apartment on their first day.


I used sketch #117 from sketch-n-scrap.  Papers are Basic Grey Carte postale and Graphic 45 Come Away with Me.

Thanks for looking!

Tuesday, November 15, 2016

Thanks is for Giving

My parents always spend Thanksgiving with my sister on the West Coast while I spend it here in the East with my in-laws. I like to send them a card out there.


This card is my submission to the Give Thanks challenge at Markerpop which can be found here. I stamped and colored the leaves on the background paper as follows: the orange maple leave leaves were stamped with Memento Morocco ink and colored with Copic markers  YR02 and YR000. The brown leaves are stamped with Memento Rich Cocoa and colored with Copic markers E23 and E25. Finally, the green leaves are stamped with Nick Bantock Chartreuse Leaf and colored with Copic YG03 and YG61.  All stamps are Hero Arts, sweater paper is Simple Stories and the greeting is Basic Grey. 


Monday, November 14, 2016

Mitzvah Trip

The word Mitzvah means commandment, and can also be used to refer to a good deed. For my Son's Bar Mitzvah, we traveled to Israel where we volunteered with Leket, the Israeli food bank and food rescue organization. One of the places we volunteered with Leket was in an overgrown field harvesting Leeks that would otherwise go to waste. Leket then distributes the food to food banks and poor people who wouldn't otherwise get fresh produce. Here is a page I made about Leket. I used the color scheme from color challenge #52 at Your Next Stamp which can be found here. I used YNS stamps for the little flower in the lower right and the mushroom in the lower left. Papers are Basic Grey Offbeat collection.


While we were in Israel, we also spent time relaxing in Tel Aviv and touring in Jerusalem. I made this double page for my son's Bar Mitzvah album with photos of him at famous sites in Jerusalem.  I used this sketch from Let's Scrap. Papers are from Heidi Swapp No Limits collection.


These 2 pages will both go in his Bar Mitzvah album. Thanks for looking!

Tuesday, November 1, 2016

Paper Leaf Tutorial

Although  there are a wide variety of leaf embellishments available on the market, I love to make my own. It is very easy and saves money. 


I have leaf stamps which I use to make these leaves. However, these instructions could be modified to use die-cut leaves or leaves fussy cut from patterned paper. If you are not coloring your leaves, then you can jump down to the part where I fussy cut the leaf. 

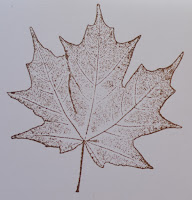
I start by stamping the image onto my paper. It's best to use an ink that doesn't bleed in water and relatively flimsy cardstock.  Since I plan to color them, I choose some markers which are appropriate for leaves, in this case fall leaves. 


I decided to stamp my leaves with brown ink to coordinate with the leaf, but black would work too.  For this maple leaf, I chose to use 3 shades of yellow and a blender. I color dark to light so I made the inside of my leaf dark shading out to a lighter color near the edges. Leaves with darker edges shading to a lighter center also look realistic, so there are plenty choices for coloring. I start with my darkest shade and just color some of the middle of the leaf. Next I take one shade lighter and color further towards the edges. My strokes with this marker go over the color from the darker marker to blend. I continue coloring in this manner with all my shades, in this case 3, until the leaf is completely covered. Then I use my colorless blender over all the other colors from the inside towards the edge. I continue using the colorless blender until I like how the colors are blended. If you don't have markers, you can color the leaf with colored pencils, watercolors, or ink and a waterbrush. Leaves are not perfect in nature and the coloring doesn't need to be perfect either. 


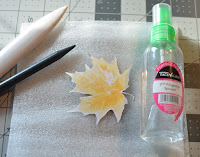
Once I am satisfied with the look of the leaf, I fussy cut it out. I don't wait for the markers to dry, I'm just careful with the damp paper. Once the leaf is fussy cut, I put it upside-down on something soft (like the palm of my hand or a foam mat). 


Now is time to shape the leaf. First, I lightly squirt the back of the leaf with the water. Then I play with it to form the shape. I don't have a fancy stylus so I just use anything plastic with a rounded tip I can find, such as a bone folder (plastic knives and spoons would work also). I gently poke the back of the  wet leaf with a rounded tool on the back just inside the edges to make the edges curl

Next I turn the leaf right-side up and fold along the veins. Sometimes I poke in the middle a bit as well. Typically, I flip the leaf over a couple of time poking and folding until I have the desired shape. You might need to squirt more water on the front, but be careful as too much water will make the leaf tear.


Then I let the leaf dry until it can maintain its shape and be handled.  I can adhere it to my page or card using glue dots or foam as I would with any paper flower or leaf. 


Leaf supply list:
Generic white card stock
Hero Arts stamp
Memento ink Rich Cocoa
Copic markers: Y11, Y17, Y21, and colorless blender

Card supply list:
Authentique paper Grateful collection
Simple Stories Sweater Weather collection chipboard and die-cut
Quick Quotes Powder puff ink Mocha Mama

Thanks for stopping by!

Thursday, October 20, 2016

Change of Plans

We were traveling through Europe and we planned to spend a few days in this Mediterranean village, but bad weather was coming in and we didn't like where we were staying, so we took a little walk and left before the bad weather came. I like my kids to learn to be flexible about travel plans, even if you spent a lot of time making plans. Here is a page I made about this with the few photos we took.


I used this sketch from Stuck?!This is my entry to the Kaisercraft October Blog Challenge, which can be found here. I chose the top row across which includes fussy cutting (the word enjoy), 3 patterned papers (all from the Sandy Toes collection so they blend well, but there are 3), embossing (the lifesaver is dry embossed), and quote (stamped quote from Thoreau). I used the Kaisercraft Sandy Toes collection for the 3 papers and stickers and the Kaisercraft Nautical stamp and die set for the anchor and lifesaver. 

Saturday, July 23, 2016

Maki a Wish

This birthday card is for my Mom. She likes sushi and I think this pun is perfect for her. I used the "Maki a Wish" stamp set from Your Next Stamp for the color challenge #44 which can be found here and card sketch #78 from sketch-n-scrap which can be found here. The papers are from the Graphic 45 Bird Song collection, sushi rolls are colored with copics.


Tuesday, July 5, 2016

Summer penguin

I usually make large cards, but this little penguin from Your Next Stamp is soooo cute, that I made this little card just his size. I used sketch 42 from YNS which can be found here and I colored him with copics.

Thanks for looking!

Friday, June 17, 2016

To a Fungi...

I never owned any mushrooms stamps, and now suddenly I have 2 sets both of which I used to make this Father's Day card. The mushrooms across the top of this card are made from matching stamps and dies from YNS and colored with Prima watercolors (Decadent Pies), the lower mushrooms and greeting are Lawn Fawn stamps colored with copics.


 I used sketch 41 from YNS and am entering this into the father's day challenge at Markerpop.

Thanks for looking!

Wednesday, June 1, 2016

Cards with Primary Colors

Here are some cards that I would like to share today.

We seem to be going to a lot of Bar Mitzvahs lately. I only have a few appropriate stamps, so I use the same ones on all the cards and I generally stick with blue and white. I like the clean lines on this one and the gold vellum, so I may use this design again for the next Bar Mitzvah.


I used my copics to color the flowers on this next card. The flower stamps are from Heartfelt Creations, I don't own the matching dies so I had to fussy cut them. The green stamps are from a very old set from Fancy pants called Pollen Dust. 


Thanks for stopping by!

Tuesday, May 31, 2016

Purple flowers for Father's Day?

I made this card for my husband and I'm not sure when to give it to him. We like to go wine tasting together which is what inspired me, but somehow purple flowers might be better for our anniversary  and something a bit more manly for Father's Day.


The papers and stamps are from Heartfelt Creations and the flowers, leaves, and scene are all colored with copics.

Thanks for looking!

Wednesday, May 11, 2016

Mother's Day

My kids are not twins, they are 2 years apart, and I am not very tall, but somehow as we hit mother's day this year, all 3 of us are the same size. We planned this photo for mother's day with a yardstick across our heads. By the next major holiday, I will be the shortest one in the family.


I recently discovered a cool online store and blog called MarkerPop. They have challenges that require you to use copics, which is a breeze for me because I use my stamps and copics on almost every project I create. The current challenge (which you find here)  is for Mother's day, but I had already mailed my mother's day cards when I saw the challenge, so I created this layout for the challenge. I used my copics to color all the red and orange flowers and the word "Mom." I used this sketch from Stuck?!

Thanks for looking!

Tuesday, April 5, 2016

Bright Colored Card

Here is a fun card I made inspired by this photo over at Creative Embellishments. The photo inspired me to pull out this musical embossing folder that I haven't used in a while. It also inspired me to use the bright colors in a rainbow and to add butterflies. The masking for the stripes was just simple pieces of paper which I moved somewhat randomly. The flower and the bird are colored with my copics. The word "happy" is from CE and I painted it with acrylic paint. I included the twist which is the song title "Happy."


Thanks for looking!

Friday, April 1, 2016

Thursday, March 31, 2016

Charles Bridge

I love this color scheme from challenge 35 at Your Next Stamp.


I usually make cards for their challenges (and I already made one for the sketch in this challenge), but this color scheme inspired me to create this layout of the beautiful and famous Charles Bridge in Prague.I used a stamp from the YNS Maki a Wish stamp set to stamp the I heart on the my title tag.


Thanks for looking!

Saturday, March 19, 2016

Prague

We took a boat ride in Prague, it was so nice to be away from the heat and crowds and see this beautiful city from a different angle. I used this sketch from ScrapMuch? for my page.


Monday, March 14, 2016

Palatino Pools

It was really hot when we were in Budapest, so we cooled down at this huge pool complex. I used this sketch from ScrapMuch? for my page.


 Thanks for looking!

Just swimming by....

Here is a little card I made using this cute stamp set from Your Next Stamp. It is my entry to YNS stamp and color challenge #34 which can be found here.


Thanks for looking!

Monday, March 7, 2016

Synagogue in Budapest

The Dohany Synagogue in Budapest is one of the largest Jewish synagogues in world. We had the opportunity to visit it this summer. I used this sketch from Stuck?! to document our visit.


Thanks for looking!

Friday, March 4, 2016

Budapest

Budapest was actually 2 separate cities Buda and Pest which were combined during the communist era. The good tourist areas are in Buda but we stayed in Pest and walked everywhere and it was very hot (close to 100 degrees) when we were there. I used this sketch from Let's Scrap to scrap these photos of Budapest. 


Thanks for looking!

Thursday, February 11, 2016

The Most Beautiful Place

When my son was in third grade, he was assigned a country project on Slovenia. I helped him with it and we learned about Lake Bled, which looked like a beautiful place. When we were traveling through Europe this summer, we got to stop at Lake Bled and it is even more beautiful in person. Our entire family agrees that this may be the most beautiful place we have ever been. Here are a few scrapbook pages that I have made about this beautiful place.

This page shows the 1000 year old castle looming over the lake and a few photos taken at the castle.


This beautiful church on an island is the view from the castle on this companion page which uses this sketch from Stuck?!


This next page shows the castle lit up in the evening. It is my entry to this challenge from Creative Embellishments, I was inspired by the large heart in their photo and the chipboard smile is from CE.


In case you are not ready to pack your bags, let me also tell you that the lake is clean and warm enough for swimming and you can borrow a rowboat and row to the island. The church is beautiful inside too.

Thursday, January 28, 2016

Monte Carlo

While we were in Monaco, we walked to the famous Monte Carlo casino and gawked like tourists at all the fancy cars.  Here is my page for this challenge from cupcake inspirations:


The challenge is to use the color scheme inspired by this image:

Thanks for looking!

Saturday, January 23, 2016

A walk in France

When we were in Avignon, France, we saw a Fort off in the distance and decided to walk there. The free boat across the Rhone wasn't running that early, so we ended up walking across the "car bridge" and we ended up in the Languedoc region (had no idea it was so close) and walked through the cutest village, of which I have no photos, to the Fort, and back down stopping for a few groceries and picnic by the Rhone on the way back. We had booked a 2pm tour, so we needed to get back. I do have photos of the Fort and the picnic, which I will put on separate layouts. Despite the hurry, this was one of my favorite things we did on the whole trip. I want to go back to this area and spend more time. Here is my first page about this walk:


And here is a page with photos of the Fort. I used this sketch from ScrapMuch for this page.


Both of these pages use papers from Heartfelt Creations Italian Riviera collection. I think these papers work perfectly for the Rhone valley as well. The flower stamps are also from Heartfelt Creations.

Wednesday, January 20, 2016

More Grapes

 Lately, I have been playing with wine and grape stamps and the color purple. January and February seem to be card season in our family.This card, which I made using sketch 30 from Your next Stamp, will be sent to my in-laws for their upcoming Anniversary. I used the "Life Is Grape" stamp from YNS  for the wine scene and papers from Heartfelt Creations.


Thanks for looking!

Tuesday, January 19, 2016

You are the World

Here is a card that I made for my husband. I will give it to him for either his birthday or Valentine's day, depending on the other card I make for him.


I am entering this card into several challenges: the cupcake inspiration challenge 343 which can be found here, the January color challenge from ScrapMuch which can be found here, Your Next Stamp sketch challenge #30, which can be found here, and the Cats Pajamas anything goes challenge which can be found here. The papers and map stamp are from Heartfelt Creations Celebrate the Journey collection.

Thursday, January 14, 2016

Purple Birthday Card

My sister's favorite color is purple, so I pulled our all my purple markers and inks and made this card for her.

I am entering this in this quick quote challenge to use stencils and ink. I used a Tim Holtz Bubble stencil and 2 shades of purple chalk ink to add the subtle dots to the background.

Tuesday, January 12, 2016

Rhone Valley

We loved our little visit to Avignon and the Rhone Valley so I am really enjoying scrapping all of the photos. These photos were taken on the hill above the village of Chateneuf-du-Pape. I made these sunflowers to use on the page because we saw fields of sunflowers in that area even though they are not in the photos or the journaling.

I used this sketch from ScrapMuch?


Thanks for looking!

Wednesday, January 6, 2016

Time to Celebrate

Here is a birthday card that I made for my Dad (assuming I can find a 6x6 envelope to mail it in).


I used the inspiration photo from Creative Embellishments that can be found here. I was inspired by all the wheels to use lots of gears. I also completed the twist of a circular element and my product from CE is the wooden arrow, which I altered with stickles.

I used the sketch from Your Next Stamp which can be found here. I also used 4 of the 5 colors in the color part of the challenge.

Thanks for looking!

Tuesday, January 5, 2016

The Hike

It's a new year, but I'm still scrapping vacation photos from last year. This page is about a hike we took near Znojmo Czech Republic, it was really hot that day.


I used this sketch from ScrapMuch?!, I added a black line up the middle because the papers didn't match up and I had to add more photos on the right side so I could get the whole hike onto one double page spread.

Thanks for looking!